How to Replace Drone Propellers Safely and Correctly
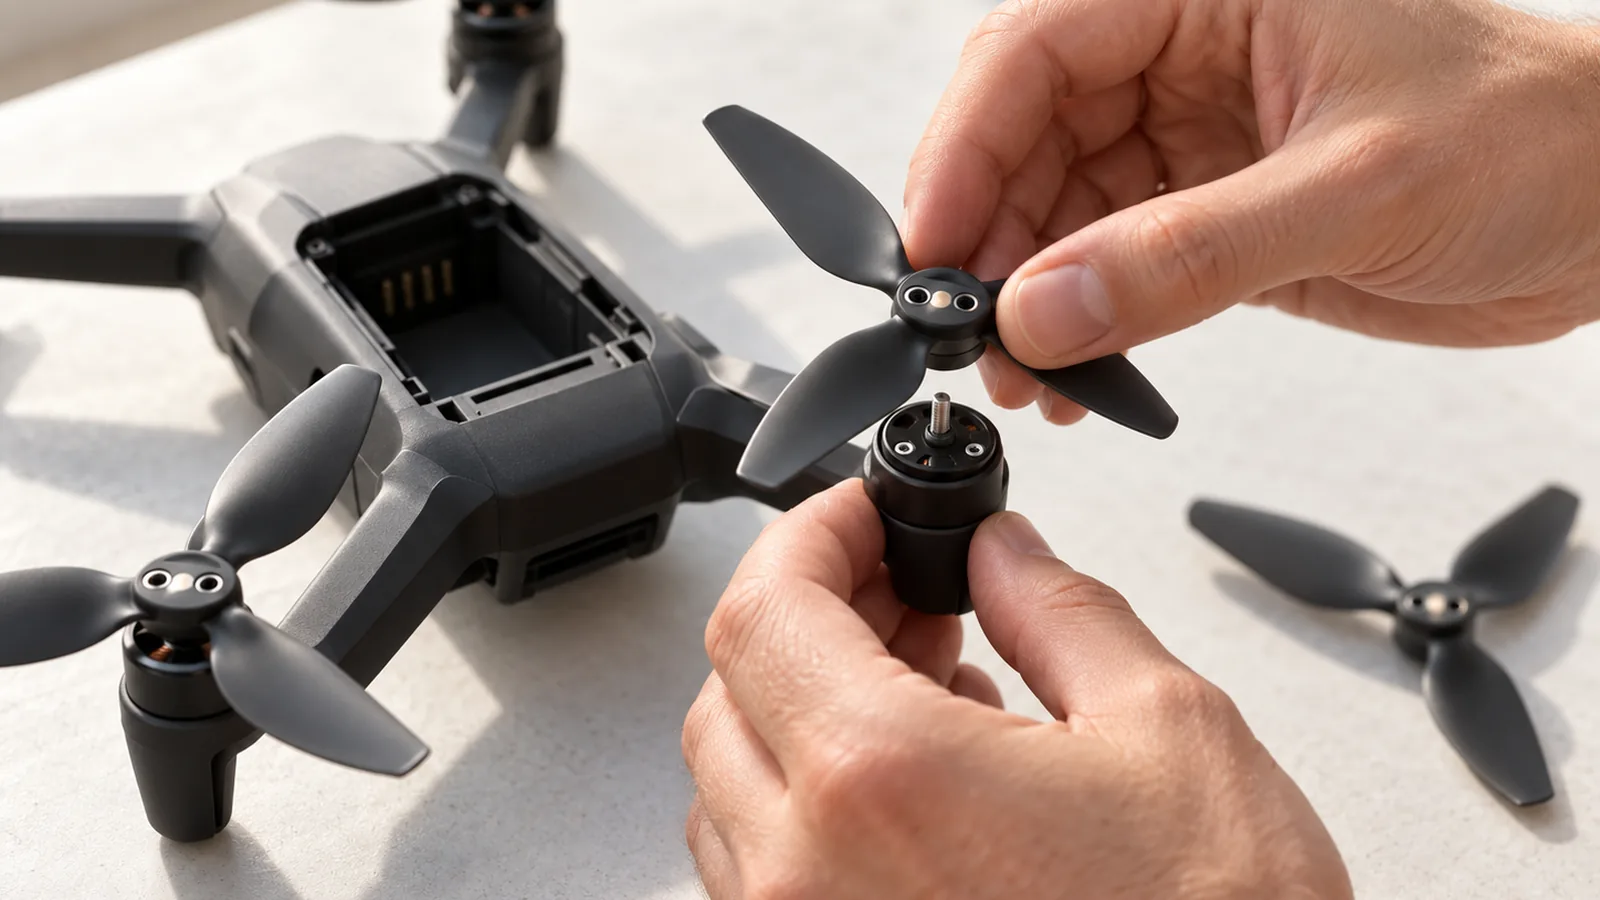
To replace drone propellers, power off the aircraft, fit each propeller to its matching motor, and secure it using the model’s attachment system. Check that every propeller and motor is secure before flight. Markings and fastening methods vary by drone, so use the parts and procedures specified for your model.
How do you replace drone propellers?
Quick answer: Power off the drone, then remove each old propeller using the attachment method made for that model. Match each replacement to its motor mount, markings, and required rotation direction, then secure it with the specified release or fastener. Before flying, check that every propeller is correctly positioned, firmly attached, and undamaged.
- Power off the aircraft before touching the propellers.
- Match each replacement to the drone model and the markings on its motor and propeller.
- Remove the old propeller using that model’s attachment method: for example, the Autel EVO Max V2 uses a press-and-turn release, while the DJI Mini 2 SE and Mini 4K use a supplied screwdriver.
- Install each replacement on its matching mount and secure it using the specified method.
- Check that the propellers and motors are secure and the blades are undamaged before flight.
Replace the Propellers Step by Step
Power off the aircraft before removing a propeller; the exact release and fastening method depends on the drone model. For the Autel EVO Max V2, hold the power button for 3 seconds to shut it down before using its press-and-turn release.
| Model | Power-button hold (seconds) |
|---|---|
| Autel EVO Max V2 | 3 |
Power off the aircraft. Use its power control before touching the propellers; the 3-second hold in the table applies to the Autel EVO Max V2.
Identify each replacement and its mount. Match propellers to the markings on the aircraft, and use the model’s instructions to confirm the correct position and rotation. Markings and positions vary by model.
Remove the old propeller using its attachment method. On the Autel EVO Max V2, hold the motor rotor, press the propeller’s center shaft, and turn in the marked release direction. DJI Mini 2 SE and Mini 4K propellers use a supplied screwdriver for fastening, so use their specified method instead.
Inspect the propeller mounts. Check the mounting points before fitting replacements, and don’t install a propeller that is damaged, deformed, or loose.
Install and secure each replacement. Fit it to its matching mount and follow the aircraft’s markings and lock direction. Use the specified attachment method: the Autel EVO Max V2 uses a press-and-turn fitting, while the DJI Mini 2 SE and Mini 4K use screws and a screwdriver.
Check the installation before flight. Confirm every propeller and motor is secure. Maker procedures specify powering off before replacement, but don’t establish a general battery-removal step for every model.
How Do You Match Props to Each Motor?
Match each replacement propeller to the exact drone model, the motor arm markings, and the required rotation direction. The markings vary by model, so use the marks on your aircraft and its model-specific instructions rather than assuming one layout fits every drone.
For example, on the DJI Avata 2, orange-marked propellers go on orange-marked motor arms, while unmarked propellers go on unmarked arms. The two propeller types spin in opposite directions. On the Autel EVO Max V2, a white circle marks both a counterclockwise (CCW) propeller and its matching mount; the clockwise (CW) propellers and mounts have no mark.
Use the propeller-to-mount markings to identify the correct position, then follow the aircraft’s instructions for the lock direction or fastening method. Don’t transfer a marking pattern, rotation layout, or installation method from one drone to another.
Note
A mark can identify a matching propeller and mount, but its meaning depends on the aircraft model.
If the propeller or mount markings are missing or unclear, confirm the matching propeller and motor position in that aircraft’s manual before installation. Check the specified rotation and lock direction there too, since models use different marking systems and attachment methods across models.
How Can You Tell a Propeller Needs Replacing?
Replace a drone propeller if it’s damaged, deformed, corroded, loose, severely worn, or has a cracked blade or damaged hub rivet. When deciding how to replace drone propellers, treat looseness as a reason to replace the propeller, not simply reseat it, because DJI guidance calls for immediate replacement.
With the drone powered off, inspect each blade and its hub in good light. Look for these replacement signs:
- Blade damage: cracks, chips, breaks, or other visible damage.
- Deformation: a blade that has lost its shape, including deformation linked to long use.
- Corrosion or severe wear: either condition calls for replacement in the cited guidance.
- Hub damage: deformed or broken rivets on the hub are a replacement reason.
- Looseness: replace a propeller that is loose.
Don’t fly with aged, chipped, or broken propellers, and don’t dismiss a blade that looks misshapen just because it isn’t cracked. These examples come from specific manufacturer guidance, so they don’t establish a universal wear threshold or replacement schedule.
If the propeller has no damage or deformation and isn’t loose, remove foreign matter with a soft, dry cloth. That cleaning advice applies to a propeller that remains serviceable; it doesn’t make a damaged blade safe to use. The guidance provided does not recommend reseating a loose propeller as an alternative to replacement.
Check the Installation Before Flying
Check each propeller’s position, attachment, condition, and motor area before flight; use the checks specified for your drone model. Correct position and secure fit are the first things to verify.
With the aircraft powered off, confirm that each propeller sits on its matching motor and is fully seated and secured using that model’s attachment system. Don’t rely on a marking pattern from another drone, since propeller and motor-arm cues vary by model.
Inspect each blade for cracks, chips, breaks, deformation, or other visible damage, and replace a damaged propeller rather than flying with it. On models covered by Autel’s EVO Lite manual, also check that the motor and propeller surfaces are free of foreign objects and that the propellers and arms are fully extended. Clear motor and propeller surfaces help catch debris before flight.
Some drone manuals also call for checking that the motors are secure, not just the propellers. If you’re checking motor operation on the ground, remove the propellers first; the EVO Nano manual gives that instruction for its aircraft.
Frequently Asked Questions
Do drone propellers need to match the motor’s rotation direction?
Yes, each propeller must match the motor position and rotation direction specified for your drone; the propeller and motor-arm markings help identify the correct pair. The two propeller types spin in opposite directions on the DJI Avata 2, so don’t swap them between marked and unmarked arms.
Can you replace just one drone propeller?
Yes, you can replace a single damaged propeller if the replacement matches your drone model and the motor’s markings and rotation direction. Fit it to its matching mount, then check that it’s secure and undamaged before flight.
Do drone propellers have a front and back?
Match each propeller to its marked motor mount and required rotation direction; marking systems vary by drone, so there’s no universal front-and-back rule. Use the aircraft’s markings to confirm the correct position and lock direction before fastening the propeller.
Do you need a tool to remove drone propellers?
Use the method made for your model, with the aircraft powered off before removal.
Can you fly a drone with a chipped propeller?
No, replace a chipped propeller before flying; manufacturer guidance lists chips alongside cracks, breaks, and other visible damage as reasons to replace a blade. Don’t fly with a damaged blade, and check the replacement is secure before takeoff.
Conclusion
If you’re replacing a propeller, choose one that matches your drone model and the markings on its motor arm; if the markings are missing or unclear, confirm the correct position and rotation in that model’s manual. Then install it using the specified fastener or release method, and replace any blade that’s damaged, misshapen, or loose. Your next step is to keep the aircraft powered off while you check that every propeller is in the correct position, securely attached, and free of visible damage before flight.
Sources
- autelrobotics.com (autelrobotics.com)
- dl.djicdn.com (dl.djicdn.com)
- A Beginner's Guide to DJI Mini 2 SE & DJI Mini 4K (repair.dji.com)
- store.dji.com (store.dji.com)
- autelrobotics.com (autelrobotics.com)
- dl.djicdn.com (dl.djicdn.com)
- repair.dji.com (repair.dji.com)
- autelrobotics.com (autelrobotics.com)